Building a voice Agentic Interface for an Ionic Angular app
With Alan AI SDK for Ionic, you can create a voice Agentic Interface and embed it to your Ionic Angular app. The Alan AI Platform provides you with all the tools and leverages the industry’s best Automatic Speech Recognition (ASR), Spoken Language Understanding (SLU) and Speech Synthesis technologies to quickly build an Agentic Interface from scratch.
In this tutorial, we will create a simple Ionic app with three tabs. The app users will be able to tap the voice Agentic Interface button and give custom voice commands on each tab, and the Agentic Interface will reply to them.
What you will learn
How to add a voice interface to an Ionic Angular app
How to write simple voice commands for an Ionic app
What you will need
To go through this tutorial, make sure the following prerequisites are met:
You have signed up to Alan AI Studio.
You have created a project in Alan AI Studio.
The environment for using the Ionic framework is properly set up. For details, see Ionic documentation.
Step 1: Install the Ionic CLI
Run the following command to install the Ionic CLI:
npm install -g ionic
Note
For this tutorial, we do not need the free Ionic Appflow SDK. If the Ionic CLI asks you during the installation process: Install the free Ionic Appflow SDK and connect your app? (y/n), choose no.
Step 2: Create a template Ionic app and run it
We will be using a pre-made app template provided by Alan AI.
Navigate to the folder in which the app will reside and run the following command:
Terminal¶ionic start myTestIonicAppWithAlanButton tabs
When prompted, select to use the Angular framework:
Terminal¶Please select the JavaScript framework to use for your new app. To bypass this prompt next time, supply a value for the --type option. ? Framework: (Use arrow keys) > Angular | https://angular.io React | https://reactjs.org
Switch to the folder with the app:
Terminal¶cd myTestIonicAppWithAlanButton
Run the app:
Terminal¶ionic serve
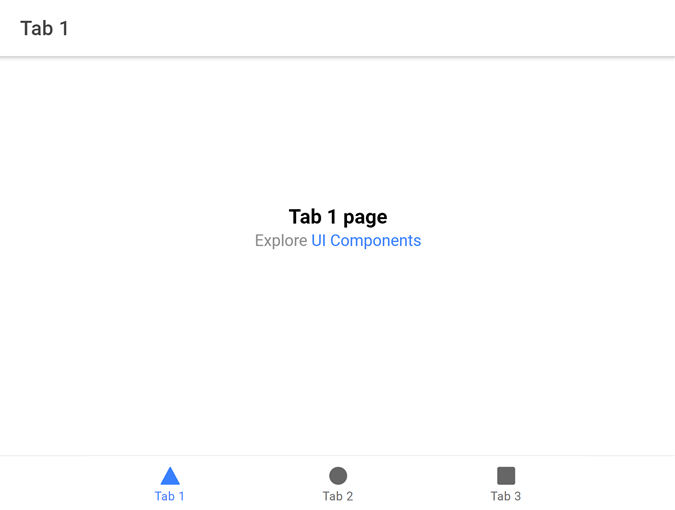
In the browser, a new window with the app will be opened. Make sure you see the right UI:
Step 3: Install Alan AI SDK for Cordova and Alan AI Web components
We need to add the Alan AI SDK for Cordova component and the Alan AI Web component to the app.
Step 4: Add the Alan AI agentic interface to the app
Now we need to update our app to add the Alan AI agentic interface to it.
First, we must tell Angular we will be using custom elements in the app. In all modules where we are planning to use custom elements, add
CUSTOM_ELEMENTS_SCHEMA. For this tutorial, we will add it to the following files:src/app/app.module.tsandsrc/app/tabs/tabs.module.ts.app.module.ts¶import {CUSTOM_ELEMENTS_SCHEMA} from '@angular/core'; @NgModule({ schemas: [CUSTOM_ELEMENTS_SCHEMA], }) export class AppModule {}
tabs.module.ts¶import {CUSTOM_ELEMENTS_SCHEMA} from '@angular/core'; @NgModule({ schemas: [CUSTOM_ELEMENTS_SCHEMA], }) export class TabsPageModule {}
In the
srcfolder, inmain.tsimport the@alan-buttoncomponent and call thedefineCustomElements(window)method:main.ts file¶import {defineCustomElements as alanBtnDefineCustomElements} from '@alan-ai/alan-button/dist/loader'; alanBtnDefineCustomElements(window);
In the
src/appfolder, inapp.component.htmladd the Alan AI agentic interface HTML tag:app.component.html¶<!-- app.component.html --> <ion-app> <ion-router-outlet></ion-router-outlet> <alan-button #alanBtnEl alan-key="YOUR_KEY_FROM_ALAN_STUDIO_HERE"></alan-button> </ion-app>
In the Alan AI agentic interface HTML tag above, we need to replace
YOUR_KEY_FROM_ALAN_STUDIO_HEREwith the Alan AI SDK key for our Alan AI Studio project. In Alan AI Studio, at the top of the code editor, click Integrations, copy the code provided in the Alan SDK Key field and paste this code toalan-key.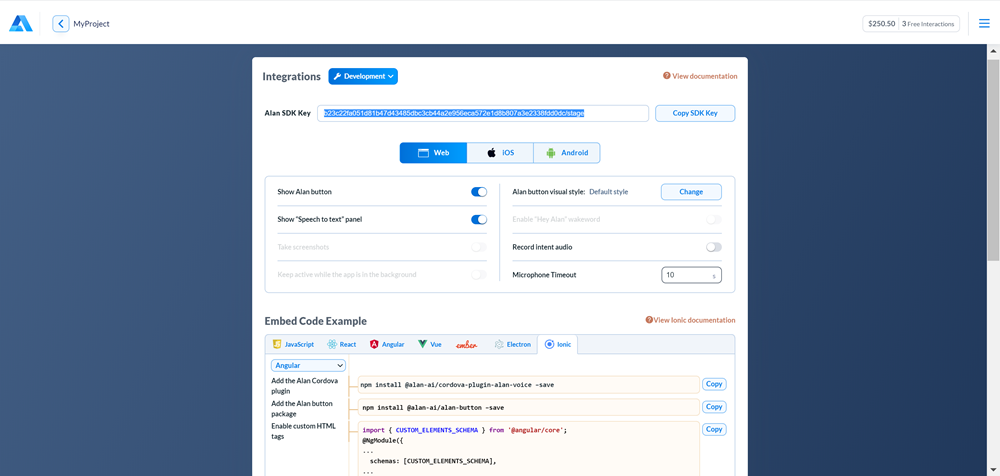
In the
src/appfolder, open theapp.component.tsfile and update it to add the Alan AI agentic interface.At the top of the file, add the import statement for the Alan AI Web Component:
app.component.ts¶import '@alan-ai/alan-button';
In the
AppComponentclass, use@ViewChildto add a reference to the Alan AI agentic interface element:app.component.ts¶@ViewChild('alanBtnEl', {static:false}) alanBtnComponent: ElementRef<HTMLAlanButtonElement>;
Replace the first import statement with the following one:
app.component.ts¶import { Component, ElementRef, ViewChild } from '@angular/core';
In the
AppComponentclass, in thengAfterViewInit()method, add a listener for thecommandevent. All commands sent from the dialog script will be passed to this method. It’s a place where you can set up logic on how the app will react to the commands from the script.app.component.ts¶ngAfterViewInit() { this.alanBtnComponent.nativeElement.addEventListener('command', (data) => { const commandData = (<CustomEvent>data).detail; if (commandData.command === 'navigation') { //call client code that will react to the received command } }); }
Run the app. On all app tabs, we can see the Alan AI agentic interface. Click it and say: Hello.

Step 5. Add voice commands
Let’s add some voice commands so that we can interact with Alan AI. In Alan AI Studio, open the project and in the code editor, add the following intents:
intent(`What is your name?`, p => {
    p.play(`It's Alan, and yours?`);
});

intent(`How are you doing?`, p => {
    p.play(`Good, thank you. What about you?`);
});
Now in the app click the Alan AI agentic interface and ask: What is your name? and How are you doing? Alan AI will give responses provided in the intents.
What’s next?
You can now proceed to building a voice interface with Alan AI. Use the following resources:
Have a look at the next tutorial: Navigating between tabs in an Ionic Angular app.
Go to Dialog script concepts to learn about Alan AI’s concepts and functionality you can use to create a dialog script.
In Alan AI Git, get the Alan Food Delivery Ionic app. Use this app to explore how a voice interface for a delivery app can be built.